How to Paint a Bike Frame at Home
The first step in painting a bike frame is to understand the benefits of painting it at home, as well as the safety precautions and tools required to complete the job.
A. Benefits of Painting a Bike Frame at Home:
- Cost Savings: Painting a bike frame at home can be much cheaper than having it done professionally.
- Customization: By painting the frame yourself, you have complete control over the color and design, allowing for a unique and personalized look for your bike.
- Repair: If your bike frame is damaged or has rust, painting it can help hide the damage and provide a protective barrier.
B. Safety Precautions:
- Wear Protective Clothing: When painting, it’s important to wear gloves, eye protection, and a mask to protect against fumes and overspray.
- Ventilation: Painting in a well-ventilated area is important to avoid inhaling toxic fumes from the paint and thinner.
- Fire Safety: Keep a fire extinguisher nearby in case of any accidental fires.
C. Tools and Materials Required:
- Paint: Choose a paint that is suitable for metal surfaces, such as enamel or epoxy.
- Thinners: Choose a thinner specifically recommended for the paint you are using.
- Primer: A rust inhibitor and primer are necessary to ensure proper adhesion of the paint to the frame.
- Sandpaper: Different grits of sandpaper are needed for cleaning and preparing the surface of the frame.
- Brushes: Use high-quality brushes to apply the paint and primer.
- Masking Tape and Paper: To protect the areas of the bike that you do not want to paint.
D. Steps for Prepping the Frame for Painting:
Remove any rust: Sand down any rust spots and clean the surface thoroughly.
Clean the frame: Use a degreaser to remove any dirt, oil, or grime from the surface of the frame.
Sand the surface: Sand the surface of the frame to create a rough surface for the primer and paint to adhere to.
Mask the areas you do not want to paint: Use masking tape and paper to cover any areas of the bike that you do not want to paint, such as the wheels and suspension.
Clean the surface again: Clean the surface of the frame again to remove any sanding dust or debris.

Cleaning and Sanding the Frame
Cleaning and sanding the frame is an important step in preparing the surface for painting. The goal is to remove any dirt, grime, or rust from the frame and create a smooth surface for the primer and paint to adhere to.
A. Removing Dirt and Grime:
Degreaser: Use a degreaser to remove any dirt, oil, or grime from the frame. This will ensure that the paint will adhere to the surface appropriately.
Wipe down the frame: Use a clean cloth to wipe down the frame to remove any residual degreaser.
B. Sanding the Surface for Better Paint Adhesion:
Sandpaper: Use different grits of sandpaper to sand the frame, starting with a coarser grit and working your way up to a finer grit.
Sand in a circular motion: Sand the frame in a circular motion to ensure that all surfaces are evenly sanded.
Pay attention to any rust spots: Make sure to sand down any rust spots thoroughly, as they can affect the adhesion of the primer and paint.
C. Cleaning the Surface for Final Preparation:
Clean the frame: Use a clean cloth and water to remove any sanding dust or debris from the frame.
Dry the frame: Allow the frame to dry completely before moving on to the next step.
Check for any missed spots: Make sure to thoroughly inspect the frame for any missed spots or areas that may need additional sanding.
It’s important to take the time to clean and sand the frame properly, as this will affect the final outcome of the painting process. A clean and smooth surface will result in a better-looking and longer-lasting paint job.
Priming the Frame
Applying primer to the frame is an important step in the painting process as it helps the paint adhere to the surface and provides a protective barrier against rust.
A. Choosing the Right Primer:
Rust Inhibitor: Choose a primer that contains a rust inhibitor to protect the frame from future rust.
Compatibility with Paint: Choose a primer that is compatible with the paint you plan to use.
Primer for Metal Surfaces: Look for primers specifically designed for metal surfaces.
B. Preparing the Primer:
Thin the primer: If necessary, thin the primer according to the manufacturer’s instructions to ensure proper consistency for application.
Stir the primer: Stir the primer thoroughly before use to ensure an even application.
C. Applying the Primer:
Brush or Spray: Choose to apply the primer with a brush or a spray gun, depending on your preference and skill level.
Thin and Even Coats: Apply thin, even coats of primer to the frame, allowing each coat to dry completely before applying the next.
Pay attention to details: Pay attention to details such as corners and crevices, making sure to apply primer to all surfaces.
It’s important to allow the primer to dry completely before moving on to the next step, as this will ensure proper adhesion of the paint. Following the manufacturer’s instructions for drying times is crucial to the success of the painting process.
Painting the Frame
Painting the frame is the final step in the process of transforming your bike’s appearance. The goal is to apply an even and smooth coat of paint to the primed frame.
A. Choosing the Right Paint:
Compatibility with Primer: Choose a paint that is compatible with the primer used on the frame.
Durability and Quality: Choose a high-quality paint that will be durable and long-lasting.
Color: Choose a color that you like and that matches your bike’s aesthetic.
B. Preparing the Paint:
Thin the paint: If necessary, thin the paint according to the manufacturer’s instructions to ensure proper consistency for application.
Stir the paint: Stir the paint thoroughly before use to ensure an even application.
C. Applying the Paint:
Brush or Spray: Choose to apply the paint with a brush or a spray gun, depending on your preference and skill level.
Thin and Even Coats: Apply thin, even coats of paint to the frame, allowing each coat to dry completely before applying the next.
Pay attention to details: Pay attention to details such as corners and crevices, making sure to apply paint to all surfaces.
D. Finishing Touches:
Clear Coat: Consider applying a clear coat to protect the paint and add shine.
Sanding and Polishing: Once the paint is dry, sand and polish the frame to create a smooth, glossy finish.
It’s important to follow the manufacturer’s instructions and allow the paint to dry completely between coats. Taking the time to properly paint the frame will result in a beautiful, long-lasting finish for your bike.
How to Paint a Bike Helmet at Home
Final Steps
The final steps of the painting process are important to ensure that the paint adheres properly and that the final result is a durable and long-lasting finish.
A. Allowing the Paint to Dry:
- Allow the paint to dry according to the manufacturer’s instructions.
- The drying time for paint can vary, so it’s important to be patient and allow enough time for the paint to dry completely.
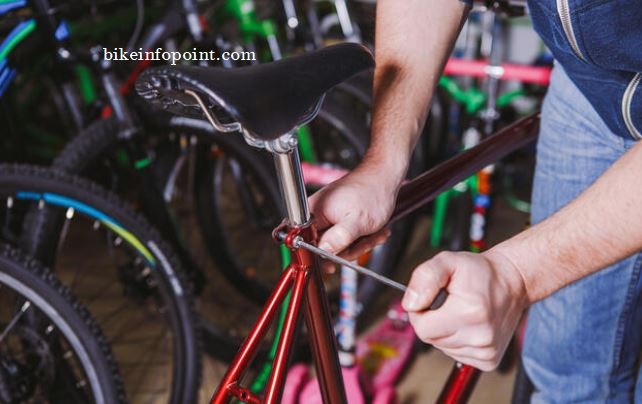
B. Reassembling the Bike:
- Carefully reassemble the bike: Once the paint has dried completely, carefully reassemble the bike, making sure not to scratch or damage the paint.
- Test the bike: Test the bike to ensure that it is functioning properly and that all parts are securely in place.
C. Caring for the Paint:
- Protect the paint: Avoid exposing the painted frame to harsh elements, such as direct sunlight or extreme temperatures.
- Clean the frame regularly: Regular cleaning with gentle soap and water will help keep the paint looking new.
D. Touching Up the Paint:
- Store extra paint: Store any extra paint for touch-ups in the future.
- Touch up any chips or scratches: Touch up any chips or scratches in the paint as soon as possible to prevent rust from forming.
E. Enjoy Your Newly Painted Bike:
- Show off your work: Enjoy your newly painted bike and show it off to friends and family.
- Ride with pride: Ride your bike with pride knowing that you transformed its appearance with your own hard work and creativity.
By following these final steps, you can ensure that your bike’s paint job will be long-lasting and beautiful for years to come.
Conclusion
Painting a bike frame at home can be a fun and rewarding project that allows you to personalize your bike and give it a new look. By following the steps outlined in this outline, you can successfully paint your bike frame and transform its appearance.