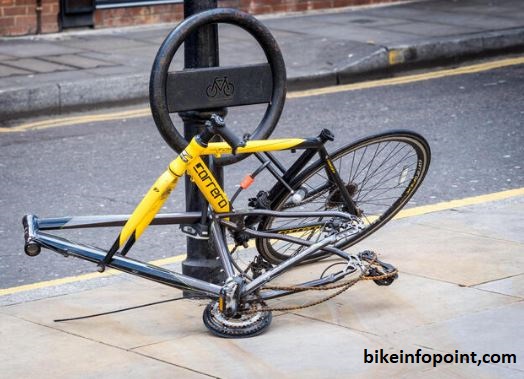
How to clean bike parts
The question is “How to clean bike parts?”
Certainly! Let’s delve deeper into the introduction, focusing on the importance of regular bike maintenance and the benefits of cleaning bike parts.
Importance of Regular Bike Maintenance
Bicycles, like any mechanical device, require consistent care to operate at their best. Regular bike maintenance is not just a matter of upkeep; it’s a fundamental practice that influences the overall performance, safety, and longevity of your bicycle. Here’s an in-depth look at the importance of regular bike maintenance:
Preserving Functionality:
Just as a car needs regular oil changes, a bicycle requires routine maintenance to ensure all components function optimally. Regular checks on the drivetrain, brakes, and other essential parts help catch potential issues before they compromise the bike’s functionality.
Cost-Effective in the Long Run:
Neglecting maintenance might seem like a time-saver in the short term, but it often leads to more significant issues requiring expensive repairs. Regular, preventative maintenance is an investment that pays off by preventing major breakdowns and the associated costs.
Customizing for Comfort:
Regular maintenance allows riders to fine-tune their bicycles for optimal comfort. Adjusting seat height, handlebar alignment, and ensuring proper gear shifting contribute to a personalized and enjoyable riding experience.
Benefits of Cleaning Bike Parts
Cleaning bike parts might seem like a simple task, but it goes beyond mere aesthetics. It directly contributes to the bike’s performance, longevity, and overall satisfaction of the riding experience. Here are detailed benefits:
Preventing Corrosion:
Mud, dust, and road salt can corrode metal components over time. Regular cleaning removes these corrosive elements, protecting the integrity of the frame, chain, and other metallic parts.
Ensuring Smooth Operation:
A clean and well-lubricated drivetrain ensures smooth gear shifting and efficient power transfer. It reduces friction, allowing your bike to operate with less resistance and effort.
Enhancing Brake Performance:
Clean brake surfaces improve braking performance. Removing dirt and debris ensures that your brakes can grip properly, providing reliable stopping power when needed.
Prolonging Component Life:
Dirt and grime can accelerate wear on bike components. Regular cleaning, coupled with proper lubrication, helps extend the life of your chain, cassette, derailleurs, and other moving parts.
Early Issue Detection:
A clean bike facilitates easier visual inspection. This makes it simpler to spot potential issues such as cracks, loose bolts, or damaged components, allowing for timely repairs and preventing more extensive damage.
In essence, understanding and prioritizing regular bike maintenance, coupled with the specific benefits of cleaning bike parts, lay the foundation for a safer, more efficient, and enjoyable biking experience. Taking care of your bicycle is not just about preserving its appearance but ensuring it operates at its peak performance for years to come.
How many parts does a bicycle have?
Gathering Supplies
A. Basic Cleaning Supplies
Bucket:
Purpose: A bucket is essential for holding water and cleaning solutions.
Usage: Fill the bucket with water and a mild soap or bike-specific cleaner for general cleaning.
Sponge or Brush:
Purpose: Used for scrubbing and cleaning various parts of the bike.
Usage: Use a sponge or brush to gently scrub away dirt and grime from the frame, wheels, and other components.
Mild Soap or Bike-Specific Cleaner:
Purpose: Breaks down dirt and grime without causing damage to the bike’s finish.
Usage: Mix with water in the bucket to create a cleaning solution for washing the bike.
B. Additional Tools
Degreaser:
Purpose: Specifically designed to break down grease and stubborn grime on the drivetrain.
Usage: Apply degreaser to the chain, cassette, and derailleurs to thoroughly clean and remove built-up grease.
Chain Cleaning Device:
Purpose: Ensures a thorough cleaning of the chain by getting into all the links and rollers.
Usage: Place the device on the chain, fill it with a degreaser solution, and rotate the pedals to clean the entire chain.
Toothbrush or Small Brushes:
Purpose: Ideal for cleaning hard-to-reach areas and small components.
Usage: Use a toothbrush or small brushes to scrub areas like the derailleur, brake calipers, and other intricate parts.
Soft Cloth or Microfiber Towel:
Purpose: Used for drying the bike and polishing surfaces.
Usage: After washing, use a soft cloth or microfiber towel to dry the bike thoroughly to prevent water spots and corrosion.
Lubricant:
Purpose: Reduces friction, prevents rust, and ensures smooth operation of moving parts.
Usage: Apply lubricant to the chain, derailleurs, and other pivot points after cleaning to maintain optimal performance.
Water Hose or Bucket of Water:
Purpose: Provides a source of water for rinsing off soap and debris.
Usage: Rinse the bike thoroughly after cleaning to remove soap residue and ensure a clean finish.
Having a well-stocked cleaning kit with these basic supplies and additional tools ensures that you have everything you need to clean your bike effectively. The combination of gentle cleaning agents, targeted brushes, and lubricants addresses various aspects of bike maintenance, from removing surface dirt to deep cleaning the drivetrain. This comprehensive set of supplies is key to maintaining the cleanliness and functionality of your bicycle.
Preparing the Bike
A. Choose a Suitable Location
Purpose:
Selecting an appropriate location for cleaning ensures efficiency and safety.
Details:
Well-Ventilated Area: Choose an outdoor space or a well-ventilated garage to avoid inhaling cleaning fumes and to allow water drainage.
Flat Surface: Opt for a flat surface to make it easier to stabilize the bike during cleaning.
Avoid Direct Sunlight: If possible, clean the bike in the shade to prevent soap from drying too quickly and leaving residue.
B. Remove Accessories
Purpose:
Removing accessories simplifies the cleaning process and protects delicate components.
Details:
Take Off Lights and Reflectors: Remove lights, reflectors, and other accessories to avoid damage during cleaning.
Detach Water Bottles: Take off water bottles to clean both the bottles and the cage thoroughly.
Remove Electronics: If applicable, detach electronic devices such as bike computers to prevent water damage.
C. Shift to the Right Gear
Purpose:
Adjusting the gears facilitates a smoother cleaning process, especially for drivetrain components.
Details:
Shift to the Smallest Chainring and Smallest Rear Cog: This position loosens tension on the derailleur, making it easier to clean the chain and derailleur.
Avoid Cross-Chaining: Position the chain to avoid extreme cross-chaining, which can stress the drivetrain.
D. Inspect the Bike for Damage
Purpose:
Identifying damage early on allows for timely repairs and prevents safety issues.
Details:
Check Frame and Fork: Inspect the frame and fork for cracks, dents, or any structural damage.
Examine Wheels: Look for trueness, loose spokes, or any damage to the rims.
Inspect Brake Components: Ensure brake pads are in good condition, and check for any issues with the brake calipers.
Evaluate Tires: Check tire condition, including tread wear, cuts, and punctures.
Inspect Drivetrain: Examine the chain, cassette, and derailleur for wear, damage, or misalignment.
Verify Tightness of Bolts: Check all bolts for tightness, including those on the stem, handlebars, and seat post.
This proactive approach not only ensures a safer and more effective cleaning session but also allows you to catch and address any potential issues before they escalate.
Cleaning the Frame
A. Wet the Bike
Purpose:
Wetting the bike helps loosen dirt and grime, making it easier to clean.
Details:
Use a Hose or Bucket: Wet the entire bike using a hose or a bucket of water.
Top to Bottom: Start from the top and work your way down, ensuring all surfaces are thoroughly wet.
B. Apply Soap or Cleaner
Purpose:
Soap or cleaner breaks down and removes dirt, grease, and other contaminants.
Details:
Choose a Suitable Cleaner: Use a mild soap or a bike-specific cleaner to avoid damaging the bike’s finish.
Dilution: If using concentrated cleaner, follow the recommended dilution instructions.
Apply Evenly: Use a sponge or brush to apply the cleaner evenly across the frame.
C. Scrub with Sponge or Brush
Purpose:
Scrubbing removes stubborn dirt and grime, especially in hard-to-reach areas.
Details:
Work in Sections: Divide the bike into sections and focus on one area at a time.
Use Different Brushes: Utilize a sponge or soft brush for larger surfaces and a smaller brush or toothbrush for intricate areas.
Apply Gentle Pressure: Scrub with moderate pressure to avoid damaging the paint or finish.
D. Rinse Thoroughly
Purpose:
Rinsing removes soap, dirt, and contaminants, leaving a clean surface.
Details:
Top to Bottom: Rinse from the top of the bike, allowing the water to carry away dirt and soap.
Thoroughly Rinse All Surfaces: Ensure all parts of the frame, including the underside and hard-to-reach areas, are thoroughly rinsed.
E. Dry the Frame
Purpose:
Drying prevents water spots, corrosion, and ensures a polished appearance.
Details:
Use a Soft Cloth or Microfiber Towel: Gently dry the frame with a soft cloth or microfiber towel.
Pay Attention to Details: Dry all parts, including nooks, crannies, and areas around bolts.
Prevent Water Stagnation: Tilt the bike to allow water to drain away from sensitive components.
Regular frame cleaning not only contributes to the aesthetics of your bicycle but also prevents corrosion and extends the life of the frame.
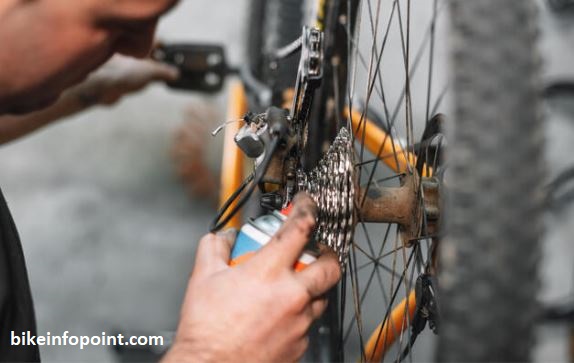
Cleaning the Drivetrain
A. Apply Degreaser to the Chain, Cassette, and Derailleurs
Purpose:
Degreaser breaks down built-up grease and grime on the drivetrain.
Details:
Choose a Suitable Degreaser: Select a bike-specific degreaser for effective cleaning without causing damage.
Apply Directly: Use a brush or applicator to apply degreaser directly to the chain, cassette, and derailleurs.
B. Use a Chain Cleaning Device
Purpose:
A chain cleaning device provides a thorough cleaning of the chain, removing dirt from the links and rollers.
Details:
Attach the Device: Secure the chain cleaning device to the chain, following the manufacturer’s instructions.
Fill with Degreaser: Pour degreaser into the device’s reservoir.
Rotate the Pedals: Rotate the pedals to move the chain through the device, allowing the brushes to clean each link.
C. Scrub with Brushes or Toothbrush
Purpose:
Brushes and toothbrushes help scrub away stubborn grime and reach intricate parts of the drivetrain.
Details:
Use Different Brushes: Employ a variety of brushes, such as a dedicated drivetrain brush and a toothbrush, for different components.
Scrub Thoroughly: Scrub the chain, cassette, and derailleurs to remove grease and dirt.
Pay Attention to Detail: Clean jockey wheels, pulleys, and other small components with precision.
D. Rinse Thoroughly
Purpose:
Rinsing removes degreaser, dissolved grime, and contaminants from the drivetrain.
Details:
Use a Hose or Bucket: Rinse the drivetrain with a hose or a bucket of water.
Rotate the Pedals: Rotate the pedals while rinsing to ensure thorough cleaning of the chain.
E. Dry the Drivetrain
Purpose:
Drying prevents water-induced corrosion and ensures a clean, well-lubricated drivetrain.
Details:
Use a Dry Cloth: Wipe the chain, cassette, and derailleurs with a dry cloth to remove excess water.
Apply Lubricant: Once dry, apply a suitable chain lubricant to the chain to ensure smooth operation.
Cleaning the drivetrain is a critical aspect of bike maintenance as it directly influences shifting performance and the overall efficiency of your ride. By applying degreaser, using a chain cleaning device, scrubbing with brushes, rinsing thoroughly, and drying the drivetrain, you not only maintain the cleanliness of these essential components but also contribute to their longevity and optimal functioning. Regular drivetrain maintenance is key to a smoother, quieter ride and prevents premature wear on costly components.
Cleaning Wheels and Tires
A. Scrub Brake Surfaces
Purpose:
Cleaning brake surfaces ensure optimal braking performance.
Details:
Apply Degreaser if Necessary: If there’s noticeable residue on the brake surfaces, apply a small amount of degreaser.
Use a Suitable Brush: Gently scrub the brake surfaces with a soft brush to remove dirt and brake pad residue.
Avoid Contaminating Pads: Take care not to let degreaser or cleaning agents come into contact with the brake pads.
B. Clean Hub and Spokes
Purpose:
Cleaning the hub and spokes maintains the overall cleanliness and appearance of the wheel.
Details:
Apply Soap or Cleaner: Use a sponge or brush with mild soap or cleaner to clean the hub and spokes.
Inspect for Loose Spokes: While cleaning, visually inspect the spokes for any that may be loose or damaged.
Dry Thoroughly: Ensure that the hub and spokes are thoroughly dried after cleaning to prevent water-induced corrosion.
C. Wipe Down Tires
Purpose:
Wiping down tires removes dirt and debris, improving the overall appearance of the bike.
Details:
Use a Damp Cloth: Wipe the tire surfaces with a damp cloth to remove dirt, mud, or any accumulated grime.
Inspect for Cuts or Punctures: While cleaning, visually inspect the tire tread for cuts, punctures, or any signs of wear.
Check for Embedded Debris: Ensure there are no sharp objects embedded in the tire that could lead to flats.
D. Check Tire Pressure
Purpose:
Regularly checking tire pressure ensures a smooth and efficient ride.
Details:
Use a Pressure Gauge: Check the tire pressure using a reliable pressure gauge.
Refer to Manufacturer Recommendations: Inflate the tires to the recommended pressure specified by the manufacturer.
Inspect for Damage: While checking pressure, visually inspect the sidewalls and tread for any damage or irregularities.
Inspecting and Lubricating
A. Check for Wear and Tear
Purpose:
Inspecting for wear and tear helps identify components that may need replacement or adjustment.
Details:
Visual Inspection: Conduct a visual inspection of the entire bike, focusing on critical components such as the frame, fork, and key moving parts.
Look for Cracks or Dents: Examine the frame and fork for any cracks or dents that may compromise structural integrity.
Check Seams and Welds: Pay attention to seams and welds, as they are common areas where stress can lead to fatigue.
B. Inspect Brake Pads
Purpose:
Regular inspection of brake pads ensures reliable stopping power and prevents unnecessary wear on rims.
Details:
Check Pad Thickness: Inspect the brake pads for sufficient thickness. Replace them if they are approaching the wear indicators.
Look for Embedded Objects: Ensure there are no embedded objects like rocks or debris that could damage the brake pads or compromise braking performance.
Check for Even Wear: Verify that the brake pads wear evenly on both sides.
C. Lubricate Moving Parts
Purpose:
Lubrication reduces friction and prevents wear on moving parts, ensuring smoother operation.
Details:
Identify Pivot Points: Locate pivot points on components like derailleurs, brake calipers, and shifters.
Use a Lightweight Lubricant: Apply a small amount of a lightweight, bike-specific lubricant to pivot points.
Cycle the Components: Move the components back and forth to distribute the lubricant evenly.
D. Apply Chain Lubricant
Purpose:
Lubricating the chain reduces friction, prevents rust, and extends the life of the drivetrain.
Details:
Clean the Chain: Before applying lubricant, ensure the chain is clean and free from dirt or debris.
Use Appropriate Lubricant: Choose a chain lubricant suitable for the riding conditions (wet, dry, or all-purpose).
Apply Lubricant Evenly: Apply a small amount of lubricant to each chain link, rotating the pedals to ensure even distribution.
Wipe Off Excess: After applying, use a clean cloth to wipe off excess lubricant to prevent attracting dirt.
This preventative maintenance not only ensures that your bike operates optimally but also allows you to catch and address potential issues before they become more significant problems.
Reassembly
A. Reattach Removed Accessories
Purpose:
Reattaching accessories ensures that your bike is fully equipped and ready for safe and comfortable riding.
Details:
Lights and Reflectors: Reattach lights and reflectors to enhance visibility, especially during low-light conditions.
Water Bottles: Securely place water bottles back into their cages for hydration during rides.
Electronics: Reconnect electronic devices like bike computers, ensuring they are properly mounted and secured.
B. Double-Check All Fastenings
Purpose:
Double-checking fastenings ensures that all components are securely attached, preventing potential safety hazards.
Details:
Use a Torque Wrench: For critical components like stem bolts, handlebars, and seat post clamps, use a torque wrench to achieve the manufacturer’s recommended torque settings.
Inspect Bolts and Nuts: Visually inspect all bolts and nuts, ensuring they are tightened to the appropriate specifications.
Pay Attention to Pedals: Ensure that pedals are securely threaded into the crank arms.
C. Test Brakes and Gears
Purpose:
Testing brakes and gears confirm that these critical systems function correctly, ensuring rider safety.
Details:
Brake Test:
Squeeze the brake levers to ensure that the brakes engage smoothly and with sufficient force.
Check for any unusual noises, such as rubbing or squeaking, and address them if present.
Confirm that the brake pads make full contact with the braking surfaces.
Gear Test:
Shift through all gears to ensure smooth and accurate shifting.
Listen for any unusual noises during shifting, and investigate the cause if necessary.
Verify that the chain moves smoothly across the cassette and chainrings without hesitation.
By reattaching removed accessories, double-checking all fastenings, and testing brakes and gears, you complete the reassembly process with attention to detail and safety. This step is crucial to ensure that your bike is fully operational and ready for use. A thorough reassembly not only prevents potential issues during rides but also provides peace of mind, knowing that your bike is in top condition. Regularly checking and maintaining these aspects contribute to a safer and more enjoyable cycling experience.
Final Touches
A. Polish the Frame
Purpose:
Polishing the frame enhances the appearance of your bike and protects the paint or finish.
Details:
Use Bike-Specific Polish or Wax: Apply a bike-specific polish or wax to the frame.
Buff with a Soft Cloth: Gently buff the frame with a soft cloth to achieve a clean and polished look.
Focus on Visible Areas: Concentrate on visible areas, such as the top tube, downtube, and seat stays.
B. Clean and Lubricate Pedals
Purpose:
Cleaning and lubricating pedals ensure smooth rotation and prevent premature wear.
Details:
Remove Dirt and Debris: Wipe off any accumulated dirt or debris from the pedal surfaces.
Apply Lubricant to Pedal Axle: If applicable, apply a small amount of lubricant to the pedal axles to promote smooth rotation.
Check for Play: Verify that there is no excessive play or wobbling in the pedals.
C. Check and Adjust Seat and Handlebars
Purpose:
Checking and adjusting the seat and handlebars ensures proper bike fit and rider comfort.
Details:
Inspect Seat Height and Angle:
Check that the seat is securely fastened and at the correct height.
Adjust the seat angle if necessary to ensure a comfortable riding position.
Check Handlebar Alignment:
Verify that the handlebars are securely fastened to the stem.
Ensure that the handlebars are aligned with the front wheel and centered.
Maintenance Schedule
A. Establishing a Regular Cleaning Routine
Purpose:
Establishing a regular cleaning routine is the foundation of proper bike maintenance.
Details:
Frequency: Determine how often you’ll clean your bike based on usage and riding conditions. For casual riders, a monthly cleaning might suffice, while frequent riders may benefit from more regular cleaning.
Post-Ride Inspection: After each ride, quickly inspect your bike for visible issues, wipe down the frame, and address any immediate concerns.
Deep Cleaning Sessions: Plan for deeper cleaning sessions at regular intervals, addressing all components systematically.
B. Noting Signs of Wear and Addressing Issues Promptly
Purpose:
Promptly addressing signs of wear prevents further damage, ensuring a safer and more reliable bike.
Details:
Regular Inspections: Conduct regular, thorough inspections of your bike, paying attention to components such as the drivetrain, brake pads, tires, and frame.
Listen for Unusual Noises: Be attentive to any unusual noises during rides, such as creaks, clicks, or grinding sounds, as they can indicate underlying issues.
Check for Play or Wobble: Regularly check for play or wobble in key components like the headset, bottom bracket, and pedals.
Monitor Tire Wear: Keep an eye on tire wear patterns, looking for uneven wear or signs of damage.