How to Paint a Bike Helmet at Home
Painting a bike helmet can be a fun and creative way to personalize it, but it’s important to ensure that the process does not compromise its safety. The helmet should continue to meet safety standards after painting.
Table of Contents
TogglePreparation
A. Gathering materials: To paint a bike helmet, you will need several materials, including a bike helmet, sandpaper, primer, paint, and a clear coat. It is essential to choose high-quality materials that are suitable for use on bike helmets, as some materials can be harmful to the integrity of the helmet and reduce its safety. Before starting the painting process, ensure that you have all the materials you need.
B. Cleaning the helmet: Before you start painting, it is crucial to clean the helmet thoroughly. A clean surface will ensure that the primer and paint adhere well and provide a smooth, even finish. Use a soft cloth or sponge and mild detergent to clean the helmet. Avoid using abrasive cleaners or scrubbers, as they can scratch the surface of the helmet. Rinse the helmet thoroughly and let it dry completely before moving on to the next step.
C. Sanding the helmet: After the helmet is clean and dry, the next step is to sand the surface. This step is crucial as it provides a surface that is rough enough for the primer and paint to adhere to. Sand the surface of the helmet with fine-grit sandpaper until it is slightly rough. Make sure to sand the entire surface evenly and avoid sanding too hard in one area, as this can cause a noticeable difference in the surface texture. After sanding, wipe the surface clean with a cloth to remove any dust or debris.
Priming
A. Applying primer to the helmet: After the helmet has been prepared, the next step is to apply a coat of primer to the surface. Primer is a preparatory coating that provides a smooth surface for the paint to adhere to. Primer also helps to protect the helmet from moisture, which can cause the paint to peel or bubble. To apply the primer, use a paintbrush or spray can, following the manufacturer’s instructions. Be sure to cover the entire surface of the helmet evenly and avoid applying too much primer in one area.
B. Waiting for the primer to dry: After applying the primer, it’s important to let it dry completely before moving on to the next step. The drying time will vary depending on the type of primer you use, but it is typically between 24-48 hours. Avoid touching the helmet’s surface or exposing it to moisture while the primer is drying.
C. Purpose of priming: The purpose of priming is to create a smooth, even surface that the paint can adhere to. Primer also helps to protect the helmet from moisture, which can cause the paint to peel or bubble. By applying a coat of primer, you can ensure that the paint will have a smooth and even finish and that the helmet will be protected for a longer period. Priming also helps to cover any scratches, dings, or other imperfections on the surface of the helmet, making the final paint job look better.
Painting
A. Applying the paint: After the primer has dried completely, the next step is to apply the paint to the helmet. Paint is used to give the helmet its desired color and finish. To apply the paint, use a paintbrush or spray can, following the manufacturer’s instructions. Be sure to cover the entire surface of the helmet evenly and avoid applying too much paint in one area. If necessary, apply multiple thin coats of paint instead of one thick coat.
B. Waiting for the paint to dry: After applying the paint, it’s important to let it dry completely before moving on to the next step. The drying time will vary depending on the type of paint you use, but it is typically between 24-48 hours. Avoid touching the helmet’s surface or exposing it to moisture while the paint is drying.

Clear Coating
A. Applying the clear coat: After the paint has dried, the next step is to apply a clear coat. A clear coat is a protective layer that provides a glossy finish and protects the paint from scratches and other damage. To apply the clear coat, use a paintbrush or spray can, following the manufacturer’s instructions. Be sure to cover the entire surface of the helmet evenly and avoid applying too much clear coat in one area.
B. Waiting for the clear coat to dry: After applying the clear coat, it’s important to let it dry completely before moving on to the next step. The drying time will vary depending on the type of clear coat you use, but it is typically between 24-48 hours. Avoid touching the helmet’s surface or exposing it to moisture while the clear coat is drying.
C. Sanding the clear coat: Once the clear coat has dried, the next step is to sand it. Sanding helps to smooth out any bumps or rough spots on the surface and gives the helmet a smoother finish. Use fine-grit sandpaper and sand the surface lightly, taking care not to sand through the clear coat and onto the paint.
D. Reapplying the clear coat: If necessary, you can reapply a clear coat after sanding the surface. This will help to fill in any imperfections that may have been created by sanding and give the helmet a smoother, more polished finish. To reapply the clear coat, use a paintbrush or spray can, following the manufacturer’s instructions.
E. Purpose of clear coating: The purpose of clear coating a bike helmet is to protect the paint from scratches and other damage and to give it a glossy finish. Clear coating helps to extend the life of the paint job and keeps the helmet looking good for a longer period.
By applying a clear coat, you can ensure that your helmet will be protected and have a smooth, even finish that will last.
Finishing
A. Inspecting the helmet: After the final clear coat has dried, the next step is to inspect the helmet. Check the surface of the helmet for any imperfections, such as bubbles, cracks, or drips. If any imperfections are found, touch them up with paint or clear coat, as necessary.
B. Touching up the paint: If any imperfections are found in the paint, touch them up with a small paintbrush and paint. Be sure to use paint that matches the color of the helmet, and apply it in thin, even layers until the imperfections are no longer visible.
C. Installing decals: After touching up the paint, if desired, you can install decals or stickers on the helmet. Decals can be used to add logos, graphic designs, or other decorations to the helmet. Make sure to position the decals where you want them and press them firmly onto the surface of the helmet.
D. Adding a final clear coat: After installing the decals, you can add a final clear coat to the helmet. The final clear coat will help to protect the decals and provide a smooth, even finish. To apply the final clear coat, use a paintbrush or spray can, following the manufacturer’s instructions.
E. Letting the helmet cure: Once the final clear coat has been applied, it’s important to let the helmet cure for a period of time. This will allow the paint and clear coat to fully set and harden, providing a more durable finish. The curing time will vary depending on the type of paint and clear coat you use, but it is typically between 24-48 hours.
How to Store Bike Helmets in Garage
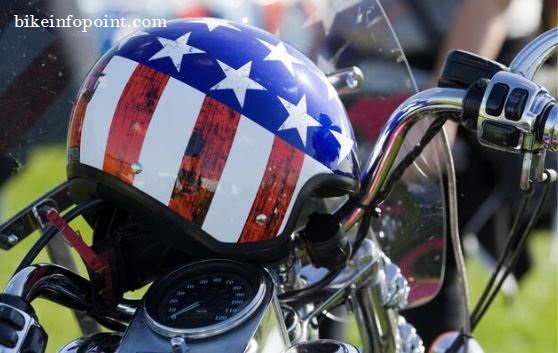
The purpose of painting a bike helmet is to give it a unique and personal touch and to make it stand out. By painting the helmet, you can make it look different from other helmets and reflect your own personal style. Painting also helps to protect the helmet from the elements and keep it in good condition for a longer period. A painted helmet is an easy and fun way to personalize your riding gear and make it your own.


