
How to Repair Bicycle Bell
Bicycle bell is very important when you ride bicycle on a busy street. A broken or malfunctioning bell can be a nuisance. But the good news is that with a few simple tools and some basic knowledge, you can easily fix it yourself. In this guide, we’ll walk you through the steps of identifying the problem, sourcing replacement parts and performing the repair.
Gather Tools and Materials
To repair a bicycle bell, you will need a few tools and materials. Here is a list of some common items that you may need:
Screwdriver: Depending on the design of your bell, you may need a Phillips head screwdriver or a flathead screwdriver to remove screws that hold the bell together.
Pliers: Pliers can be useful for gripping and turning small parts, or for removing stubborn screws.
Lubricant: If the bell is making a creaky or grinding noise, it may need to be lubricated. You can use a bicycle-specific lubricant or a light oil such as WD-40.
Cleaning cloth: A clean cloth can be used to wipe away dirt and grime from the bell components.
Replacement parts: Depending on the extent of the damage to your bell, you may need to purchase replacement parts. This may include a new striker, spring, or mounting hardware.
Optional: If you are having trouble seeing small parts or working in tight spaces, you may find it helpful to use a magnifying glass or a flashlight.
It’s a good idea to gather all of these tools and materials before you begin the repair process so that you have everything you need on hand.
Identify the Problem with the Bell
There are several common issues that may cause a bicycle bell to not work properly. Here are a few things:
The bell is not making any sound: If the bell is not ringing at all it may be because the striker is not making contact with the bell. This could be due to a bent striker, a misaligned striker or a broken spring.
The bell is making a weak or inconsistent sound: If the bell is ringing, but the sound is weak or inconsistent. It may be due to a lack of tension in the striker spring. This could be caused by a stretched spring or a spring that has lost its tension over time.
The bell is making a creaky or grinding noise: If the bell is making a strange noise when it is rung. It may be due to a lack of lubrication or dirt and grime on the moving parts.
The bell is difficult to ring: If you have to apply a lot of force to ring the bell. It could be because the striker is sticking or the spring is too tight.
By identifying the specific problem with the bell you can determine the best course of action for the repair. You may need to clean and lubricate the bell, adjust the spring tension or replace a broken or damaged part.
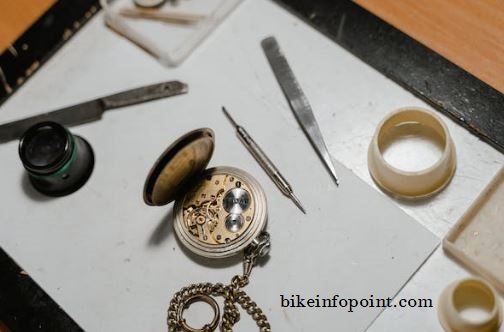
Disassemble the Bell
To disassemble a bicycle bell you will need to carefully take it apart piece by piece. Here are some general steps to follow:
Remove any screws or bolts that hold the bell together. These may be located on the sides, the top or the bottom of the bell.
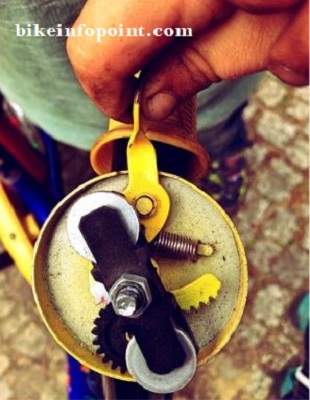
Carefully separate the bell into its individual components. These may include the striker, the spring, the mounting bracket and the bell itself.
Inspect each component for damage or wear. Look for bent or broken parts, or parts that are excessively dirty or corroded.
If the bell has a striker button, you may need to remove the button to access the striker and spring. The button may be held in place with a small screw or it may be a friction fit.
Take care not to lose any small parts, such as screws or washers. It can be helpful to lay out the components in the order that you remove that so that you know how they fit back together later.
By disassembling the bell, you can get a good look at all of the components and determine which parts may need to be repaired or replaced. It’s important to work carefully and patiently during this step to avoid damaging any of the parts.
Clean and Lubricate the Bell Components
Once you have disassembled the bicycle bell, it’s a good idea to clean and lubricate the components before reassembling it. Here are some steps to follow:
Wipe down the bell components with a clean cloth to remove dirt and grime. Pay particular attention to the striker and the spring. Because these parts may have accumulated a lot of dirt and dust.
If the bell components are very dirty or corroded, you may need to use a mild cleaning solution to help loosen and remove the dirt. You can use a mild detergent mixed with water or a specialized bike cleaning product. Be sure to rinse the components thoroughly with clean water after cleaning.
Once the bell components are clean and dry then you can lubricate the moving parts. You can use a bicycle-specific lubricant or a light oil such as WD-40. Be sure to apply a small amount of lubricant to the striker and the spring. Because parts may be prone to rust and wear.
Avoid using too much lubricant because it can attract dirt and grime and may make the bell more difficult to ring. A light coating of lubricant should be sufficient.
By cleaning and lubricating the bell components, you can help prevent wear and tear and ensure that the bell rings smoothly and consistently. It’s important to use the appropriate lubricant and to apply it sparingly, to avoid causing any issues with the bell’s performance.
Reassemble the Bell
To reassemble a bicycle bell, you will need to carefully put all of the components back together in the correct order. Here are some general steps to follow:
Begin by placing the mounting bracket in position. This may be attached to the handlebars or the stem of the bike.
Install the spring and the striker onto the mounting bracket. Following the order in which they were removed. Make sure the spring is seated properly and has the correct tension.
Attach the bell itself to the mounting bracket and make sure it is aligned properly. Some bells may be held in place with screws or bolts while others may use a friction fit.
If the bell has a striker button, install the button onto the striker. Make sure the button is seated properly and can be pressed easily.
Replace any screws or bolts that were removed during disassembly, using a screwdriver or a wrench. Be sure to tighten the screws or bolts securely. But be careful not to overtighten them.
Test the bell to make sure it is working properly. Ring the bell a few times to see if it makes a clear, consistent sound.
By reassembling the bell in the correct order, you can help ensure that it works properly and is ready to use. It’s important to be careful and patient during this process, to avoid damaging any of the parts.
Test the Repaired Bell
Once you have reassembled the bicycle bell, it’s important to test it to make sure it is working properly. Here are some things to look for:
Ring the bell a few times to see if it makes a clear, consistent sound. The bell should produce a strong and clear tone when it is rung.
Check that the striker moves freely and makes good contact with the bell. The striker should not stick or require a lot of force to move.
Make sure the spring is providing the correct amount of tension. The bell should not be too easy or too difficult to ring.
Check that the mounting bracket is secure and holds the bell in place properly. The bell should not move or wiggle when it is rung.
Test the bell in different positions and at different angles. Make sure it works properly when the bike is upright and when it is tilted.
If the bell is not working properly, try adjusting the components or adding more lubricant. If the problem persists you may need to disassemble the bell again and check for any other issues.
By testing the repaired bell, you can make sure it is ready for use and that it will function properly when you are out riding. If you encounter any problems during testing, don’t be afraid to disassemble the bell again and make any necessary adjustments.
Tips for Preventing Future Issues with the Bell
To help prevent future issues with your bicycle bell, here are a few tips to follow:
Keep the bell clean and lubricated. Dirt and grime can cause the bell components to wear out prematurely, and a lack of lubrication can lead to rust and friction. Clean the bell regularly and apply a light coat of lubricant as needed.
Avoid overtightening the mounting screws or bolts. Tightening the screws or bolts too much can cause the bell to become difficult to ring or can strip the threads.
Handle the bell gently and avoid striking it hard. Hitting the bell too hard or too frequently can cause it to wear out more quickly.
Store the bike indoors or in a covered area when not in use. Exposure to the elements can cause the bell components to rust or become damaged.
If the bell is not working properly, don’t try to force it. If the bell is making a strange noise or is difficult to ring, it may be a sign that it needs to be repaired or replaced.
By following this tips you can help extend the life of your bicycle bell and ensure that it continues to work properly for many rides to come.