
How to Install Bike Handlebar Stem
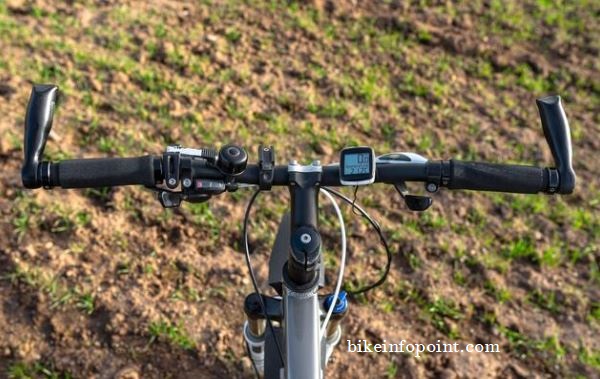
Installing a new handlebar stem on a bike can greatly improve the comfort and handling of the bike. The handlebar stem connects the handlebars to the fork steerer tube, allowing the rider to adjust the angle and height of the handlebars. A new stem can be installed for a variety of reasons, such as to improve fit, to upgrade to a lighter or stronger stem, or to change the handlebar position.
Before beginning the installation process, it is important to make sure that the new stem is compatible with the bike. This includes checking the steerer tube diameter and fork clamp diameter of the new stem, as well as the size and style of the handlebars. It is also important to ensure that the new stem has the correct length and angle to provide the desired riding position.
It’s also essential to note that Installing a new stem is a fairly straightforward process, but it does require some basic mechanical skills and the proper tools. It is also important to follow proper safety precautions and work carefully to avoid damaging the bike or injuring yourself.
Tools and materials needed
To install a new handlebar stem you will need a few basic tools and materials.
Tools:
- A socket wrench or adjustable wrench to loosen and tighten the stem bolts.
- A hex key or Allen wrench set to adjust the stem’s bolts
- A torque wrench to ensure the bolts are tightened to the proper torque specification
- A cutting tool, such as a hacksaw or a pipe cutter, to cut the steerer tube if necessary.
- A bike stand to hold the bike securely while working on it
Materials:
- The new handlebar stem
- A new top cap, if necessary
- A new star nut, if necessary
- Handlebar tape or grips, if necessary
- Grease or anti-seize lubricant to lubricate the stem bolts and steerer tube
Removing the old stem
Removing the old stem: Removing the old handlebar stem is the first step in installing a new one. The process will vary slightly depending on the type of stem and bike, but the general steps are as follows:
Loosen the stem bolts: The first step is to loosen the bolts that hold the stem in place. These are typically located on the top and bottom of the stem and are tightened with a socket wrench or adjustable wrench. Be sure to loosen both bolts evenly, to avoid damaging the steerer tube.
Remove the handlebars: With the stem bolts loose, the handlebars can be removed from the stem. Carefully slide the handlebars out of the stem, being careful not to damage the brake and shifter cables.
Remove the stem: With the handlebars removed, the stem can be pulled away from the steerer tube. If the stem is stuck, gently tap it with a rubber mallet to loosen it.
Inspect the steerer tube: Before installing the new stem, inspect the steerer tube for any damage or wear. If the steerer tube is damaged or worn, it may need to be replaced before installing the new stem.
Safety Precautions: Always make sure to wear safety gear such as goggles and gloves while working on the bike.
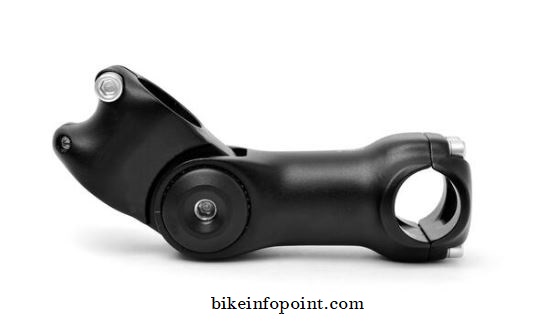
Preparing the New Stem
Before installing the new handlebar stem, it’s important to properly prepare it and ensure a proper fit.
Measure the steerer tube: Measure the diameter and length of the steerer tube on the bike to ensure that the new stem will fit properly. It’s also important to check that the new stem has the same clamp diameter as the steerer tube.
Align the stem: Align the new stem with the steerer tube and handlebars to ensure that it will be installed at the correct angle and height. This will ensure that the handlebars are in the correct position for the rider’s comfort and safety.
Adjust the length: If necessary, cut the steerer tube to the correct length for the new stem. This can be done with a cutting tool such as a hacksaw or pipe cutter. Be sure to measure twice and cut once to avoid cutting too much off the steerer tube.
Apply lubricant: Apply grease or anti-seize lubricant to the steerer tube and stem bolts to ensure a smooth installation and to prevent rust and corrosion.
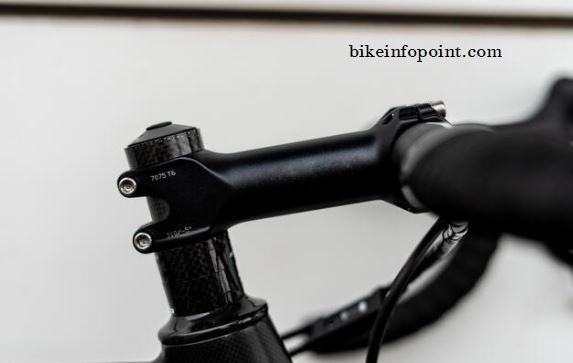
Installing the New Stem
After preparing the new handlebar stem, it’s time to install it on the bike. The process will vary slightly depending on the type of stem and bike but the general steps are as follows:
Insert the stem: Insert the new stem into the steerer tube, making sure that it is properly aligned and at the correct height.
Insert the top cap: If the bike has a threaded steerer tube, insert the top cap into the top of the stem. This will keep the stem securely in place.
Insert the star nut: If the bike has an unthreaded steerer tube, insert the star nut into the steerer tube before installing the stem. This will keep the stem securely in place.
Tighten the stem bolts: Tighten the stem bolts to the proper torque specification using a torque wrench. Be sure to tighten both bolts evenly, to avoid damaging the steerer tube.
Install the handlebars: With the stem bolts tightened, install the handlebars back into the stem. Carefully slide the handlebars into the stem, being careful not to damage the brake and shifter cables.
Safety precautions: Always make sure to wear safety gear such as goggles and gloves while working on the bike. Also, be sure to work on a stable surface and keep the bike securely held in a bike stand to avoid any accidents.
Tightening and Adjusting the Stem
After installing the new handlebar stem, it’s important to properly tighten and adjust it to ensure a secure fit and optimal riding position.
Tighten the stem bolts: Tighten the stem bolts to the proper torque specification using a torque wrench. Be sure to tighten both bolts evenly, to avoid damaging the steerer tube.
Adjust the stem angle: Adjust the angle of the stem to ensure that the handlebars are in the correct position for the rider’s comfort and safety. This can be done by loosening the stem bolts and rotating the stem to the desired angle, then re-tightening the bolts.
Adjust the stem height: Adjust the height of the stem to ensure that the handlebars are in the correct position for the rider’s comfort and safety. This can be done by loosening the stem bolts and sliding the stem up or down the steerer tube, then re-tightening the bolts.
Check for play: Check for play or movement in the stem by grasping the handlebars and attempting to move the stem. If there is any play, it may indicate that the stem bolts are not tightened enough or that the stem is not properly aligned.
Install handlebar tape or grips: Once the stem is installed and adjusted, you can install handlebar tape or grips if desired.
Test ride: Always take a test ride after installing or adjusting the stem to make sure that everything is properly tightened and adjusted and that the bike handles correctly.
Installing a new handlebar stem is an important step in maintaining your bike and ensuring a comfortable and safe riding experience. It’s crucial to follow the steps carefully, use the right tools and materials, and pay attention to safety precautions. If you are not comfortable working on your bike, it’s best to seek professional help. Regular maintenance and proper handling will help to keep your bike in good working condition and enjoy the ride.