
How to clean a bike chain with household products
Cleaning a bike chain is a crucial part of maintaining your bicycle. A dirty or poorly lubricated chain can cause shifting problems and may even lead to costly repairs. But you don’t need to buy expensive bike cleaners to get your chain clean. With a few common household products you can easily clean your bike chain and keep it running smoothly. Here’s how:
1. Gather materials:
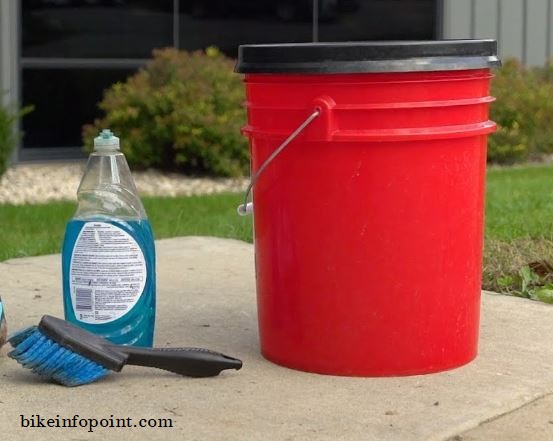
Gathering materials is an important step in cleaning your bike chain with household products. Here are some details to consider when gathering your materials:
Bucket: You will need a bucket to hold the water and soap for cleaning the chain. The size of the bucket will depend on the size of your chain and how dirty it is.
Water: You will need warm water to help loosen any dirt or grime on the chain. Cold water may not be as effective at removing dirt and could cause the chain to rust more easily.
Dish soap: Dish soap is a good choice for cleaning your bike chain because it is designed to cut through grease and grime. You will only need a small amount of dish soap- a squirt or two should be enough.
Brush: An old toothbrush or similar brush is useful for scrubbing the chain to remove dirt and grime. Make sure to use a brush with soft bristles, as stiff bristles could damage the chain.
Cloth or rag: You will need a cloth or rag to dry the chain once it has been cleaned. A microfiber cloth is a good choice because it is soft and absorbent.
Bike stand or way to prop up your bike: You will need a way to prop up your bike so that you can easily access the chain. A bike stand is ideal. But if you don’t have one, you can use a chair or other object to lift the bike off the ground. This will make it easier to work on the chain and ensure that you don’t damage your bike while cleaning it.
2. Remove the chain
Removing the chain is an important step in cleaning your bike. It allows you to access the chain and clean it more effectively. Here are some details to consider when removing the chain:
Shift to the smallest cog and chaining: If your bike has a derailleur, you can remove the chain by shifting the gears to the smallest cog in the back and the smallest chainring in the front. It will create slack in the chain, making it easier to remove.
Slide the chain off the bike: Once the chain is slack, you should be able to slide it off the bike easily. Simply lift the chain off the cog and chainring and set it aside.
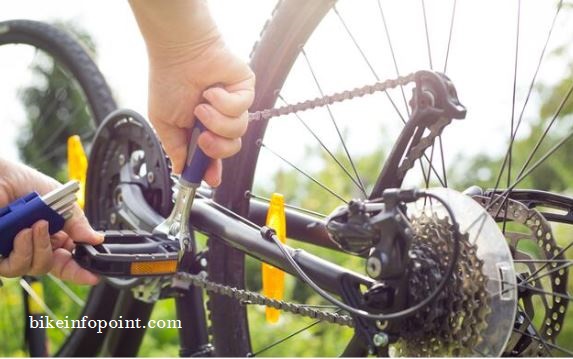
Use a chain tool if necessary: If your bike does not have a derailleur, you will need to use a chain tool to remove the chain. A chain tool is a small specialized tool that allows you to remove and reattach chain links. To remove the chain, you will need to use the chain tool to push out one of the chain pins, separating the chain into two pieces.
Save the chain pin: When you use a chain tool to remove the chain be sure to save the chain pin. You will need it to reattach the chain later.
Set the chain aside: Once the chain is removed, set it aside in a safe place. This will make it easier to clean and lubricate the chain without worrying about getting dirt or oil on the rest of the bike.
3. Clean the chain
Cleaning the chain is an important step in maintaining your bike and ensuring that it runs smoothly. Here are some details to consider when cleaning the chain:
Fill the bucket with warm water and add dish soap: Fill the bucket with warm water and add a squirt or two of dish soap. The water and soap will help loosen any dirt or grime on the chain.
Place the chain in the bucket: Once the water and soap are mixed, place the chain in the bucket. Be sure to immerse the entire chain in the water.
Scrub the chain: Use the brush to scrub the chain, working the soap into all the nooks and crannies. Pay particular attention to areas where dirt and grime tend to accumulate, such as the chain links and the inside of the chain.
Let the chain soak if necessary: If the chain is particularly dirty, you may need to let it soak for a few minutes before scrubbing. This will give the soap time to penetrate and loosen any stubborn dirt or grime.
4. Rinse the chain
Rinsing the chain is an important step in the process of cleaning your bike, as it removes any remaining dirt and soap from the chain. Here are some details to consider when rinsing the chain:
Use clean water: After scrubbing the chain, be sure to rinse it with clean water. This will help remove any remaining dirt and soap, and it will also help prevent the chain from rusting.
Rinse the chain thoroughly: It is important to rinse the chain thoroughly to ensure that all dirt and soap are removed. Be sure to rinse all parts of the chain, including the links and the inside of the chain.
Use a cloth or sponge to scrub the chain: If there is still dirt or grime on the chain after rinsing, you can use a cloth or sponge to scrub the chain. This will help remove any remaining dirt and ensure that the chain is clean.
Rinse the chain again: Once you have scrubbed the chain with a cloth or sponge, rinse it again with clean water. This will help remove any remaining dirt and soap, and it will also help prevent the chain from rusting.
Dry the chain: After rinsing the chain, be sure to dry it completely. A wet chain is prone to rust, so it is important to dry the chain thoroughly. You can use a cloth or rag to dry the chain, or you can let it air dry.
5. Dry the chain
Drying the chain is an important step in the process of cleaning your bike, as a wet chain is prone to rusting. Here are some details to consider when drying the chain:
Use a cloth or rag: You can use a cloth or rag to dry the chain. A microfiber cloth is a good choice because it is soft and absorbent.
Dry the entire chain: Be sure to dry all parts of the chain, including the links and the inside of the chain. Pay particular attention to areas that are prone to rusting, such as the chain pins and the inside of the chain links.
Wipe the chain with a cloth: Use the cloth or rag to wipe the chain dry. Be sure to apply enough pressure to remove any water from the chain, but be careful not to damage the chain.
Let the chain air dry: If you are having trouble drying the chain completely with a cloth, you can let the chain air dry. Simply hang the chain over a clean, dry surface and allow it to air dry for a few hours.
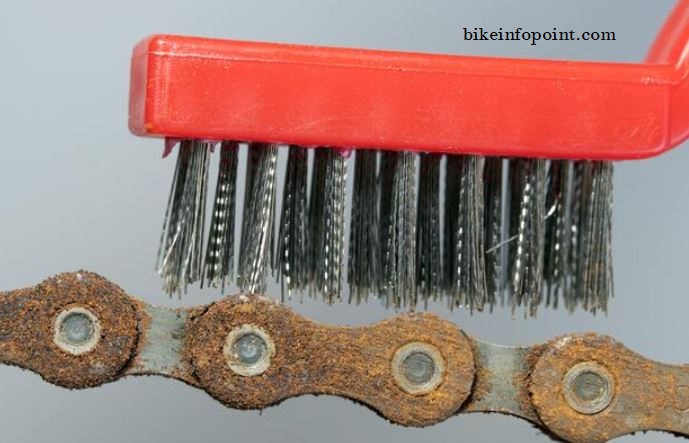
Inspect the chain: Once the chain is dry, inspect it for any rust or damage. If you notice any rust or damaged parts, you may need to replace the chain. A rusty or damaged chain can affect the performance of your bike and may need to be replaced to ensure safe and smooth operation.
How to Dry Bike after Washing- Detail Explained
6. Lubricate the chain
Lubricating the chain is an important step in maintaining your bike and ensuring that it runs smoothly. Here are some details to consider when lubricating the chain:
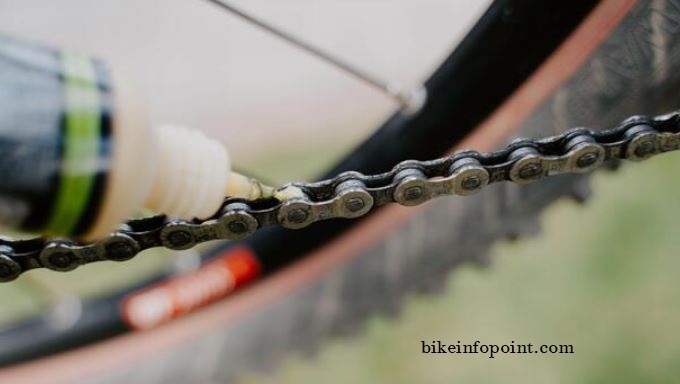
Choose a lubricant: You can use a commercial bike chain lubricant, or you can make your own using mineral oil or vegetable oil. It is important to choose a lubricant that is specifically designed for bike chains. as other lubricants may be too thick or too thin and could cause the chain to run poorly.
Apply the lubricant: Once you have chosen a lubricant, apply a few drops of it to the chain. You can use a dropper or a small spoon to apply the lubricant. Be sure to apply the lubricant to all parts of the chain, including the links and the inside of the chain.
Wipe off excess lubricant: Once you have applied the lubricant to the chain, use a cloth to wipe off any excess. Excess lubricant can attract dirt and grime, which could cause the chain to run poorly.
Test the chain: Once the chain is lubricated, test it to make sure it is running smoothly. Shift through the gears to ensure that the chain is moving smoothly and without any binding or skipping. If the chain is not running smoothly, you may need to adjust the derailleur or the chain tension.
Reapply lubricant as needed: Over time, the lubricant on your chain may start to wear off or become dirty. It is important to reapply lubricant to the chain on a regular basis to ensure that it is running smoothly and to prevent rusting.
7. Reattach the chain
Reattaching the chain is the final step in the process of cleaning your bike. Here are some details to consider when reattaching the chain:
Shift the gears to the smallest cog and chainring: If your bike has a derailleur, shift the gears to the smallest cog in the back and the smallest chainring in the front to create slack in the chain. This will make it easier to reattach the chain.
Slide the chain onto the cog and chainring: Once the chain is slack, slide it onto the cog and chainring. Be sure to align the chain properly, as a misaligned chain could cause the bike to run poorly.
Use a chain tool if necessary: If you removed the chain using a chain tool, you will need to use the tool to reattach the chain. To do this, you will need to use the chain tool to push the chain pin back into place, connecting the two halves of the chain. Be sure to use the same chain pin that you removed earlier – if you lose the chain pin, you will need to purchase a new one.
Test the chain: Once the chain is reattached, test it to make sure it is running smoothly. Shift through the gears to ensure that the chain is moving smoothly and without any binding or skipping. If the chain is not running smoothly, you may need to adjust the derailleur or the chain tension.
Check the chain tension: It is important to check the chain tension after reattaching the chain. A loose chain can cause the bike to run poorly and could even cause the chain to come off the bike while riding. A chain that is too tight can cause excess wear and could damage the bike.
Conclusion
Cleaning a bike chain with household products is an easy and effective way to maintain the smooth operation of your bike. By following these steps, you can keep your bike chain clean.